Now that I've got my figures, I need to prep them for painting. There are some sites I refer to on the painting process:
- BGG thread: "Painting Plastic Minis: A how-to-guide for Beginners"
- site "The Painting Clinic"
- site "How to paint Miniatures"
- site "Hot Lead"
- site "Brush Thralls"

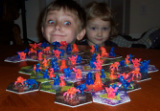
Amazon figures from Wargames Factory
Clean UR sprue...
Admittedly, this sounds like something from "Wayne's World," but sprue is the hobby term for pieces of plastic left over after breaking connections (flash is the term for material extruded from the mold - see here). You don't see this as much as you used to, probably because the figures are getting pricier and production quality has increased in proportion. My CR minis have nothing to trim, but for pieces that do, "squash" at BGG has this advice:
"'Flash' is the bits of plastic that are left on the figures when they are removed from the mold and/or their sprues. If you don't want your dudes to look like they're growing giant tumors, you'll want to carefully trim them off with your knife before you do anything else."

Your wife's toothbrush here
Brush UR stuff...
Not with toothpaste but a gentle detergent. There are chemicals left over from the casting process that prevent your primer and paint from adhering to the plastic surface. Recommendation: a gentle scrub, cleaning every nook and cranny. Returning to "squash" at BGG,
"...take 2 bowls, fill one with warm water containing a little bit of dish soap, and fill the other with cool, clean water. I then dump my figures into the bowl of soapy water, take my wife's an old toothbrush, give each figure a good top-to-bottom scrub, and chuck each one into the bowl of clean water as I finish it to give it a good rinse."

Sorely tempted to use "Optimus Primer" joke somewhere
Get UR primer on...
This starts the serious portion of preparing your figs for painting.
Primer is a suspension of rough particles in a sticky liquid and, for plastic, serves to help paint adhere and stay over a long period (see Wikipedia article on primer - paint). There is mention that the propellants used in spray cans may melt plastic. As with all chemicals, you should test your primer and paint on something disposable (I have some cheap figs to experiment on) to verify that your materials are plastic-safe. I assume that hobby-store sprays will be plastic-friendly (or at least not plastic-homicidal), but we all know what happens when you assume. If you want to be extra careful, here's some advice from Anthony Erdelji at the Paint Clinic:
"To avoid damage when priming plastic speed is the key. Spraying in quick layers gives the propellants less time to eat your miniatures. Place the figure face down in a shallow cardboard box or over some newspaper. Spray plastic figures at a short distance, about six inches or less. Remembering to start and stop spraying off the miniature, spray on ONE coat, moving the can as fast as your arm allows. Do not go back and forth with the can! Just one pass is enough. Let the primer dry a few seconds and repeat with a second coat, again spraying just one coat. Three or four coats should be enough for any figure. Wait about a half hour, then flip the figure over and repeat the same procedure on the other side."
Where Anthony suggests placing your figs horizontally, I like the suggestion to mount your figs on nails using poster putty (or other sticky putty) and inserting the nails into a foam base to produce a roundtable effect. You may then want to build a little "booth" around your work area: hot-lead.org suggests a cardboard box, torn to have a bottom, back, and both sides shielded with cardboard flaps.
Some further advice I've collected on priming:
- Make your choice of white or black. White primer will serve as a better base for bright colors and is easily covered with dark color. Black may be better for dark-toned figures with a lot of shadow or dark space, but it will be difficult to paint yellow or white on top. Gray primer is supposedly the worst of both worlds, but that's what I have so I guess I'll find out.
- Keep your primer warm and your painting environment warmer. Apparently you want your primer and subject to be room temperature or higher for good results; otherwise, it gets clumpy and sprays unevenly and may even clog the nozzle. Fortunately, I live in California so most months of the year are good for this sort of thing. I had planned to do some priming this weekend but we are having a winter storm (!!) so maybe the temps will not be optimal. Some suggest using a garage as long as your ventilation is adequate, but I would think the devil-in-the-details is the "adequate" part. I'd much rather do my painting outdoors. Brushthralls.com reminds us that your can will cool as you spray (combined gas law!), which is similar to putting your can in the freezer. So spray primer in short bursts to keep the temp from changing.
- Consider your spraying technique - detail can be lost if you smother the figure in tacky gunk, so keep your sprays quick and light. Many recommend starting the spray to the side of the figure and crossing over, stopping once you've passed the other side (here, the cardboard booth will protect your environment from being primed). Do a few coats this way , giving a few seconds to dry between each coat. Rotate your figs on their little nail pedestals and repeat on the other side. Don't forge the undersides, and remember to keep it light.
- Let the primer dry adequately before painting. Enamel primer may take 24 hours to dry; acrylic should be faster, but would it really hurt to give it the full day to "cure"?

Optimus Primer. There, I said it. You know you wish you had.
 RSS Feed
